Stop by my farmhouse and see what is happening today. Visit my vegetable garden to see what is growing or come into my kitchen and see what I am canning, freezing, or cooking.
After many hours of watching YouTube videos, ordering and shopping for supplies, and getting our seeds started we have started to assemble our dutch bucket growing system. Hydroponics is growing vegetables without soil. The system takes some knowledge to get the equipment setup and a few already rooted vegetables.
As I was searching for gardening techniques on the Internet I found several videos from MHPGarderner. He covers a lot of farming ideas from planting straight into the ground, growing veggies in his greenhouse and the idea that really caught my eye- hydroponics. So we used a lot of his ideas and here is a pic of our new system before the plants have been added.
If you are interested in this system then be sure to check out MHPgardener.
Our soil is so sandy and really does not have the nutrients needed for a great garden. We have had to work with the soil and add compost, muck, and chicken poop to the small garden area we have. We are hoping this will be the answer to expanding our growing possibilities.
Once our buckets are lined with a paint strainer and the perlite is added then we will plant tomatoes, peppers, and eggplants in the buckets. A small pump will pump the nutrients into the buckets and excess will drain back into the reservoir (AKA blue container).
The lids need to be added to the buckets. Roger has to drill a 3 inch hole in the center for the plant. The lid helps keep the rain water out (somewhat) and the wind from blowing the perlite out of the buckets.
The only vegetables left in the garden are okra and eggplant. Eggplants are heirloom from seeds purchased from Burpee. Heirloom are not always the best way to go. These eggplants are white with lavender and have no flavor. The package of seed said the eggplants were mild tasting which from now on I will translate as no flavor. Okra is doing okay even though it has rained everyday since the end of June. Some okra is in the freezer and some I have pickled but the majority has been cooked and eaten. We love okra.
The summer harvest nearly kicked by butt this year. Vegetables do not wait until you have the time or energy to do something with them. No they must be attended to immediately or you will loose the harvest. So no matter how tired I am when I come home from work I still have hours of work to do at home. I LOVE IT!!
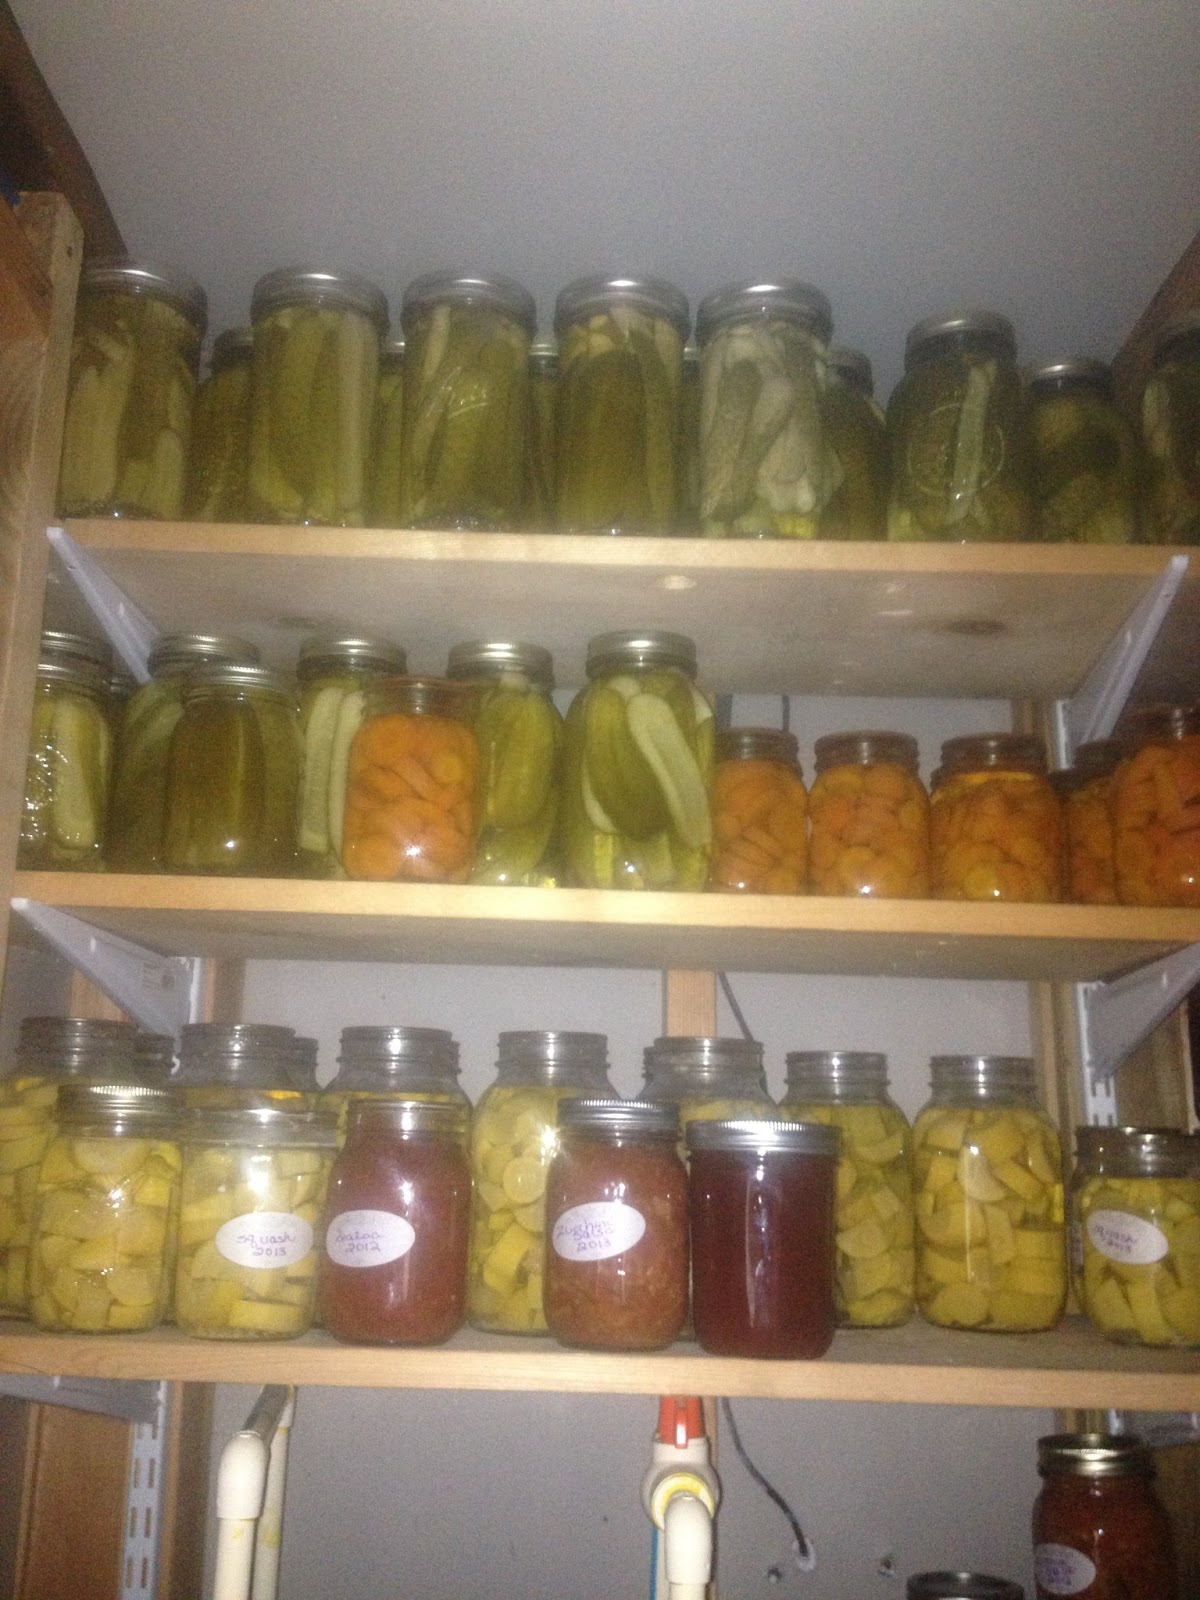
Once the freezer became full I had to go to other forms of preserving our vegetables. The top photo is my dehydrated vegetables and the bottom is canned vegetables and pickles.
My dehydrated jars consist of zuchninni , yellow squash, onions, kale, celery, strawberries, and a variety of my herbs.
Canning jars are mostly dill pickles and sweet pickles. I also canned yellow squash, tomatoes, and carrots.
First year growing carrots -- well not the first year we planted them but it was the first crop we ever harvested. When planting carrots we found that it is important to water them every morning and every afternoon until they sprout up from the ground and then water as needed - usually everyday in Florida -- until they are well established. Even the frost we had in March did not hurt the carrots.
Corn did not go so well. It would have if the worms had not eaten most of the crop. It was growing pretty big ears.
and when it was shucked the ear was pretty awesome too
We have corn in the freezer but we had to purchase it from another farm.
I have been searching for and trying a lot of zucchini recipes. I am not claiming any of these recipes as my own. All the recipes here are from my search on the internet and some I change to suite my taste. The photos are mine.
Dehydrated Zucchini Chips The kids love these chips and eat them up as soon as they come out of the dehydrator. If by chance I do have a few left I put them in a mason jar and use my seal a meal machine to seal the lid. This makes sure no moisture gets to the chips because this will influence the crispness of the chip. The chips are good as a stand alone snack or use them as a dip chip for salsa. Here is how I make them
1. After washing and trimming off ends I slice very thin on my mandolin slicer
2. In a pot of boiling water I blanch the slices for a couple of minutes
3.Remove from boiling water and put the slices into a cold water bath Remove slices and drain off excess water
4. I use my salad spinner and spin slices as dry as possible
5. Place in single layer in dehydrator, sprinkle with salt and dill and dehydrate at about 135 degrees for about 4 hours just check for crispness after 2 hours and go from there
My Favorite Zucchini Bread I have tried many recipes for zucchini bread but this is the best of all of them.
sift flour, salt, baking powder, baking soda, and cinnamon together in a bowl
Beat eggs, oil, vanilla, and sugar together in a large bowl. Add dry sifted ingredients into the creamy mixture. Stir in shredded zucchini and mix until combined.
Divide batter equally into the greased and floured pans.
Bake 40 to 60 minutes Checking to if it is done by using a tester inserted in the middle. When the tester comes out clean bread is done. cool for 20 minutes before removing from pan.
Loaves can been wrapped in plastic wrap and stored in freezer for later use. If wrapped and stored properly loaves will be good for 6 to 8 months. I put my loaves in seal a meal bags after they have frozen. This way the bread is not squeezed to much from the machine. This helps keep out any odors that the bread picks ups in the freezer.
6 Cups grated zucchini (squeeze to remove excess water)
4 Cups sugar
1/2 Cup lemon juice
1 large can crushed pineapple (juice and all)
1 (6oz) package Jello, any flavor
Boil zucchini and sugar for 20 minutes. Add lemon juice and crushed pineapple. Boil for 5 minutes. Add gelatin and stir until dissolved. Remove from heat, pour into hot jars and seal. Process in water bath for 5 minutes. Makes 6 jelly jars (half pints?).
The holidays are over and I am so excited to start the new year at my little farmhouse. Well as soon as I get over the sinus problem. Roger spent the day getting the garden ready to plant string beans and garden peas.
I decided to try something different this growing season and I ordered heirloom seeds. The string beans are called Kentucky Wonder and were first introduced in 1864 as Old Homestead. The garden peas are named Wando and are bred to be heat and cold tolerant. Hoping we can plant these early and have fresh peas in about 68 days from planting.
November 2012 has been a very strange weather month for central Florida. Last week we had some temps down to 38 degrees at night and this week the temp is in the 80's in the day. Looking around my little farm you would think it was still summer.
Yellow Summer Squash We planted the squash with the hope the weather would remain warm until we harvested the squash. So far we have been lucky
Okra Bloom and Pods- most of the okra came up in the garden from the compost and some was planted a few days after labor day.
Tomatoes -the bush with the largest
tomatoes came from a volunteer bush and the tomatoes in the pots were started at the beginning of September.
Ginger Plants are still blooming
Pomegranate Bush is putting on fruit. We planted two bushes in the spring and the small fruit fell off. I was surprised to see the bushes putting on fruit in November. The fruit will take 5 to 6 months to ripen. Keeping my fingers crossed on having mature fruit.
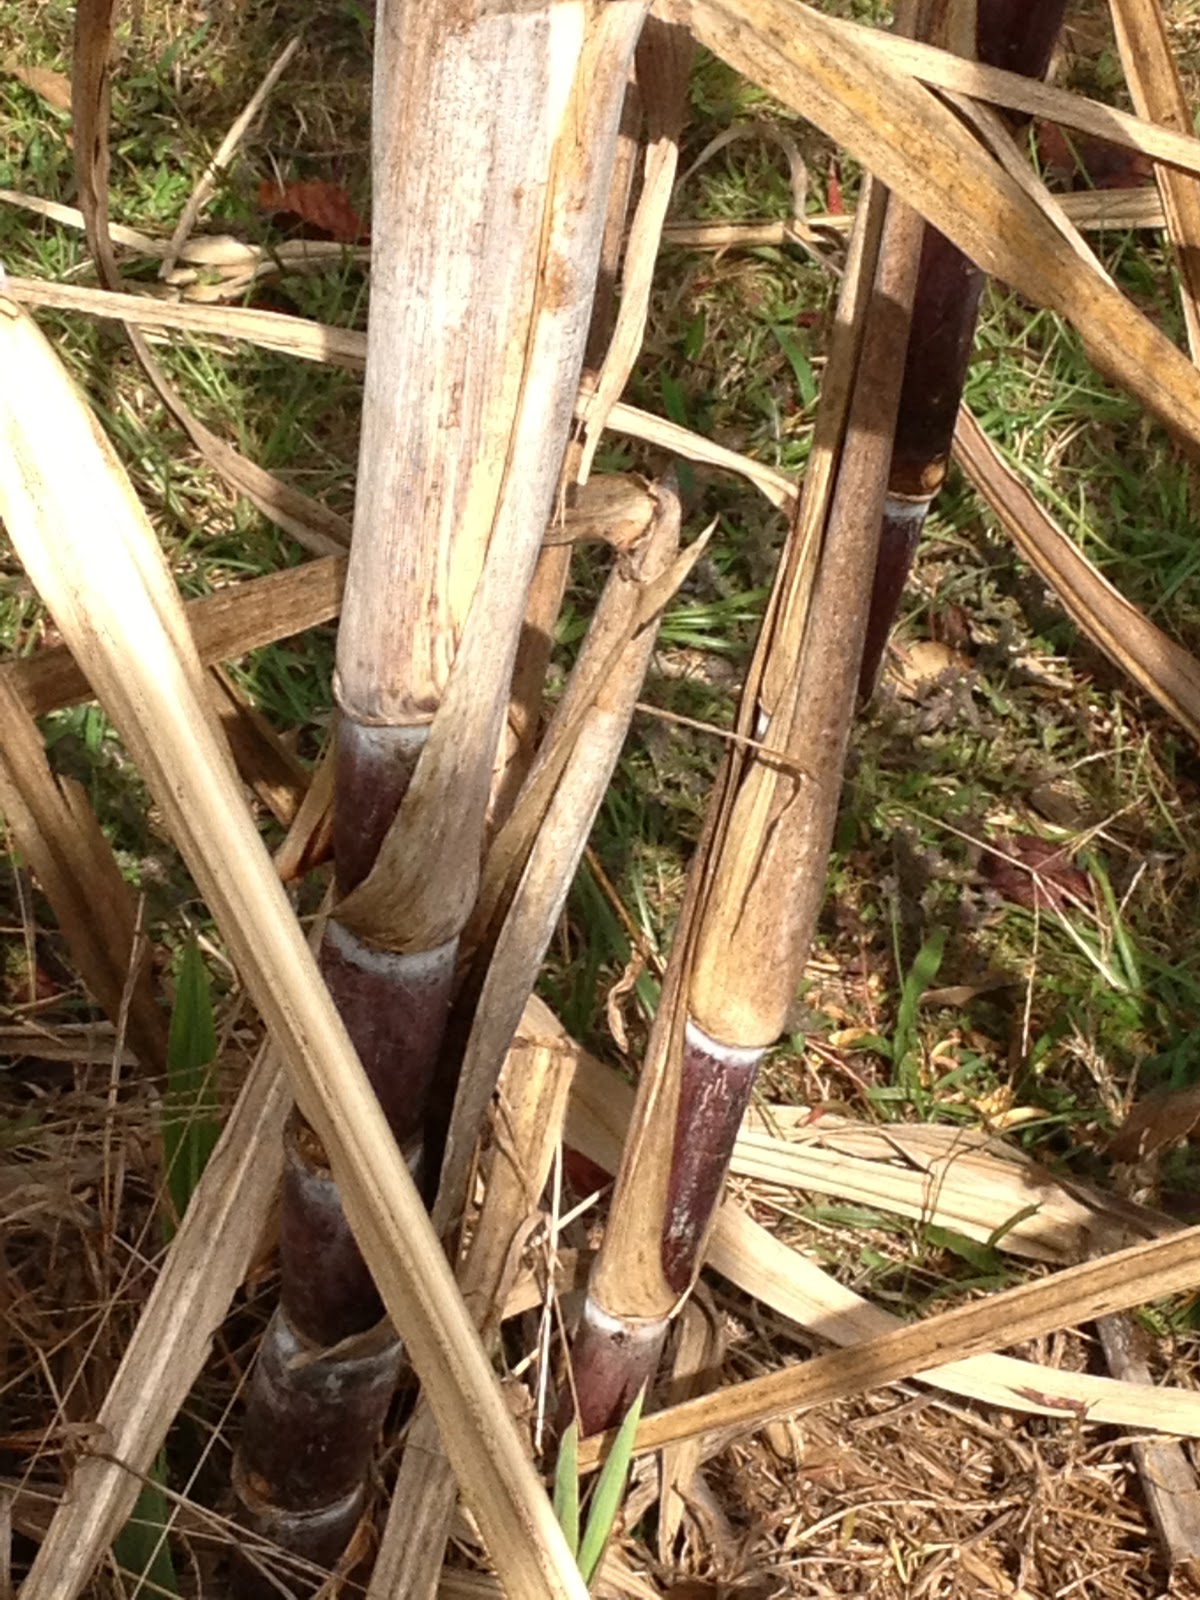
The only sign of fall and winter is the sugar cane turning purple and new shoots appearing
Another sign of fall is having lots of shrimp in my freezer. Shrimping season started late September and ended the middle of October.
Tommy and Roger picking up the shrimp
We are also lucky to have friends that like to hunt. I trade them shrimp for vension.
Chickens are growing but still slow in producing eggs
Turkeys need to grow a little more
Over all I have been pleased with what we have been able to produce and put in our freezer this month. I know the kids will be eating things that are fresh, organic, and great tasting.
Well here it is September and the peppers are still growing and producing. I will have peppers until the frost kills the bushes or Roger decides to pull them up and plant something else.
Cayenne peppers left on the bushes to dry can later be ground into pepper flakes or a powder. The food processor will work for grinding but I use a coffee grinder for this. Caution !!! let the powder settle before opening the grinder. Place in a dry mason jar for later use.
We like pepper sauce to go on our collard greens. Our pepper sauce consist of whole peppers (not dried) placed in a jar of vinger and sealed. The vinegar is infused with the pepper flavor. The infused vinegar tastes great on cooked greens.
The bananapeppers are easy to can. Slice the peppers on an angle (this makes larger rings) Place them in a non reactive pan (I use a large enamel pan) with one cup vinegar and one cup water ( double or triple this until all the peppers are in the vinegar water solution. Add salt and then I add turmeric which gives the solution a yellow color and makes the pepper rings more appealing. Heat to a boil and place in sterilized mason jars and place seal and rings on jars. I place the jars in a water bath for about 5 minutes. This insures the jars seal. Banana peppers can also be frozen. To freeze the peppers just slice and place in a plastic bag. No other processing is necessary. Jalapena Peppers I use these in my homemade salsa and I canned a few jars of rings using just vinegar, water, and salt and processed the same as my banana peppers. I put some in my dehydrator but I did not like the outcome . I have plans to put some on the grill to smoke. Other than making poppers with a cheese filling I really do not use these peppers very much.
Why purchase peppers when they are so easy to grow. Bell Peppers are my favorite pepper. I use these in many of my recipes. Freezing bell peppers is a very easy job. After I wash the peppers I cut the peppers, remove the seeds , and cut into strips. I place a single layer of peppers on a sheet tray and place in the freezer. After the peppers have frozen I place them in a plastic bag and keep them in the freezer to use as needed. Peppers do not need blanching like other vegetables.
Finally the rain quit for a little while so we decided to go to the garden and see what we could get today. Not bad for a rainy day. Check out the tomatoes, squash, dill weed, rosemary, chamomile, andpeppers.
We have four different types of peppers that includecayenne, jalapeno, banana, and bell peppers. I am drying the cayenne and plan to make dried pepper flakes, the bell peppers I cut up and freeze, and the banana peppers will be cut in rings and canned in vinegar.
The tomatoes and jalapenos are going to be used to make canned salsa. The onions for the salsa came from my moms garden.
Small red potatoes also came from my moms garden. I am going to cook them in the oven with the dill weed, a little olive oil, and salt. Bake at 350 for about 25 minutes. Can't wait for lunch. Yummy!!